Showing posts with label diy shirt. Show all posts

Wednesday, December 13, 2017

DIY vintage looking space shirt ... with a little bit of Star Wars

In this era of vivid and realistic galaxy prints everywhere you look, I really craved a vintage looking galaxy shirt, which, of course, I couldn't find anywhere. So I decided to make one! Since I am a huge Star Wars fan, I decided to spice it up a little bit on the back :)


After years of experimenting with color dyes, I discovered that navy is the trickiest color to dye cotton fabric into. After a number of trial-and-error attempts, I finally discovered that the best way to achieve that nice vintage navy color is to use diluted black dye. In order to achieve an uneven navy color I used an unevenly colored grey shirt as a base. I used black  Marabu Easy Color dye, followed the instructions on the back, but I used twice the amount of water recommended, so that shirt would not turn too dark.


Since the shirt I used was old and had a little hole in it, I first sew it and then attached a golden sequin over it using textile glue. I also added few random sequins all over the shirt, just to give it a little sparkle.


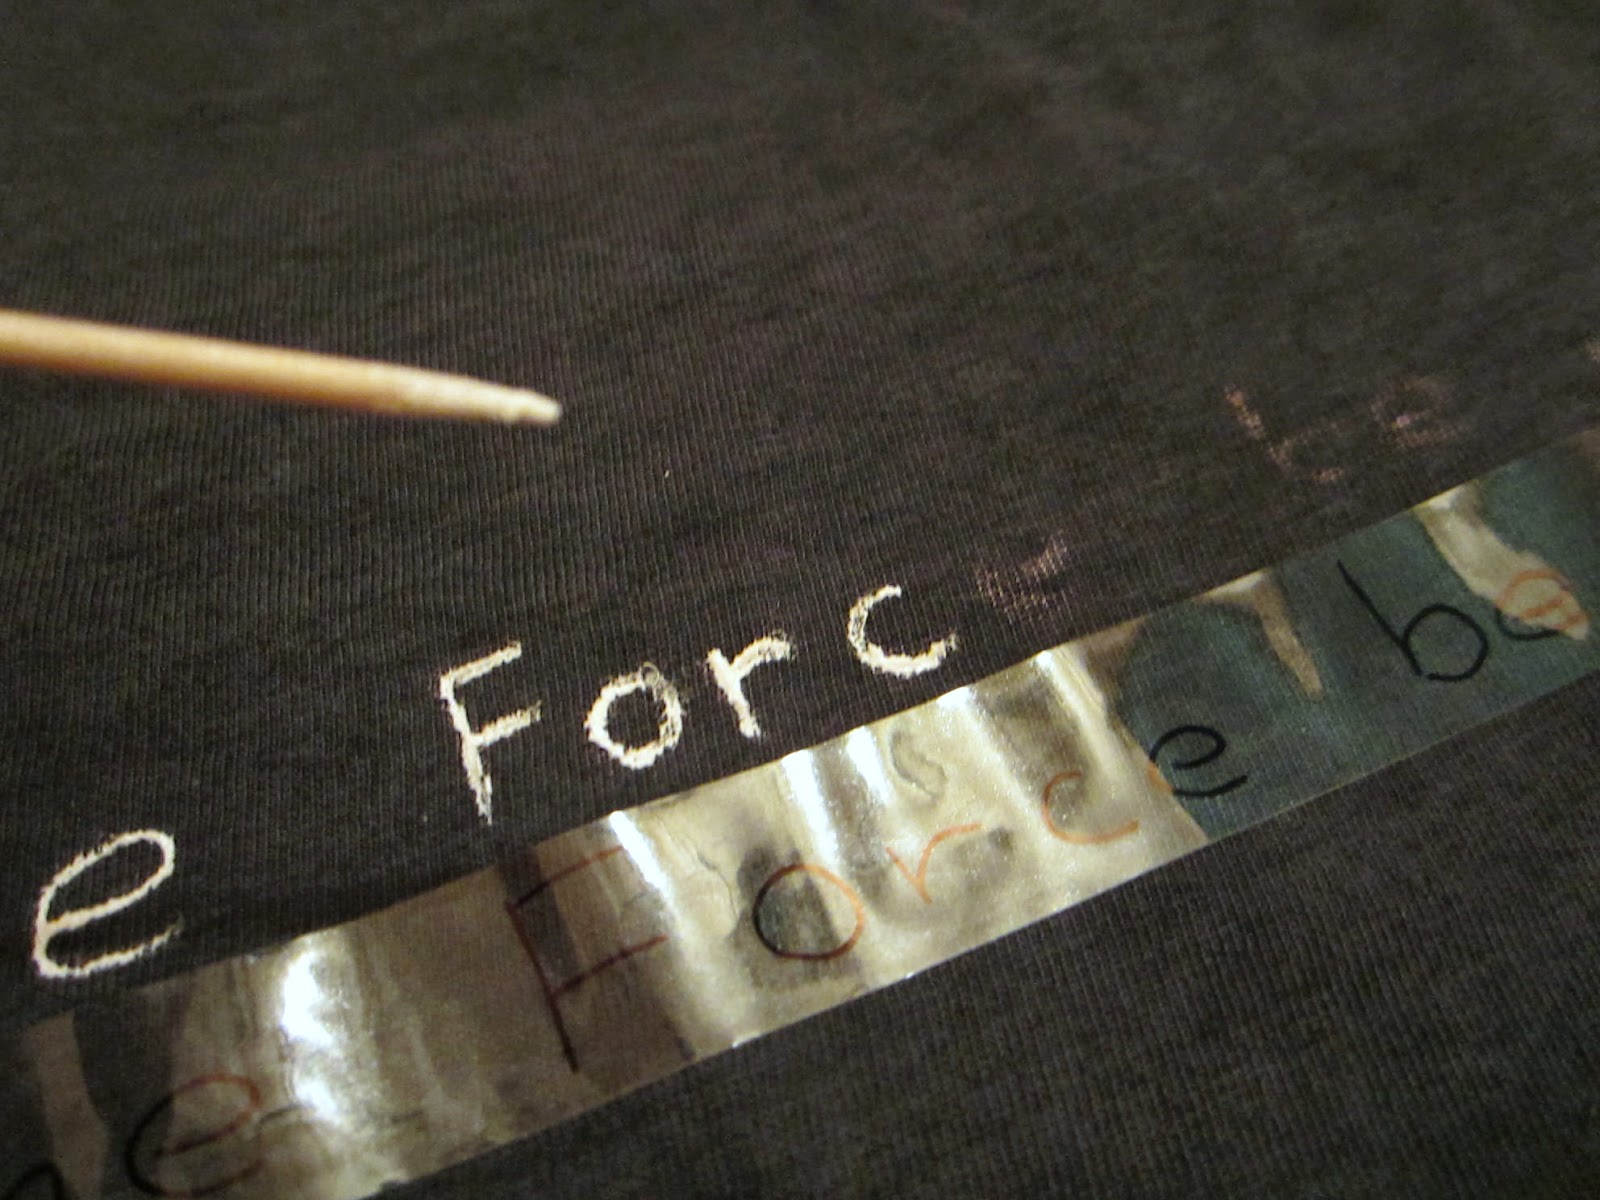
I first did letters on the back. I wrote "May the Force be with you" on a piece of plastic tape with a permanent marker, and put it just under the spot I wanted to write on, so I would get the letters properly lined.


After that I used chalk pencil to copy letters just above the plastic tape which I then removed.


Toothpick was my weapon of choice for this project, since brushes tend to smudge the lines when writing on textile. Years of expirience led me to use  Rayher DecoArt textile paint in white, since it lasts much longer on the textile, even with machine washing.


Once the letters were done, I continued using my toothpick dipped in white paint to randomly paint precise little dots and a few stars and meteors all over the shirt. This whole process took only 20 minutes, where with paint brush it would take much longer because of the smudging.


Front.


Back.


Hope you like it as much as I do! 


Sunday, May 4, 2014

May the 4th be with you. /DIY Star Wars galaxy print shirt


Da bih dobila dobru podlogu za "svemir", uzela sam staru peckavo sivu majicu  i kesicu crne farbe za tekstil. Koristila sam crnu, jer sam nakon nekoliko pokušaja farbanja garderobe u teget, ustanovila da je najbolji način da dobijete teget da koristite razblaženu crnu boju za tekstil. 

Izabrala sam bas peckavo sivu majicu jer je njoj boja u startu nejednaka, tako da će se dobiti različite nijanse teget.
Majica koju sam ja koristila je moja stara kucna majica koja ima rupicu od broša sa prednje strane, tako da sam prvo morala da zakrpim i sakrijem tu rupicu:


Kako ova šljokica ne bi bila usamljena, zalepila sam još nekoliko potpuno random.
Da bih mogla da se orijentišem, zalepila sam parče selotejpa na kome sam napisala tekst i zatim sam ga prekopirala na majicu iznad linije selotejpa starom svetlom olovkom za oči (u nedostatku krede).


Nakon ovog korka, upotrebite čačkalicu i belu boju za tekstil da ispišete tekst. 


Sačekajte da se boja osuši, i zatim uz pomoć čačkalice i bele boje istufnajte majicu. Tu i tamo razvucite tačkicu kako biste napravili zvezdu padalicu, ili razmažite tačkicu kako biste napravili sjajniju zvezdicu.


... i tako preko cele majice.


Nadam se da vam se dopada :)


Tuesday, April 22, 2014

DIY cloud shirt / Uradi sam: Majica sa oblakom


Material:
-white shirt
-pencil with eraser (unused)
-white and black textile color
-black textile marker
-paper to sketch cloud and caption
-piece of cardboard to put inside your shirt while stamping it


First use pencil to sketch cloud on your shirt. I sketched on paper first and then copied on my shirt with pencil I used for stamping.
Mix white and black textile paint to make various shades of gray. Use eraser on your pencil to stamp inside of the cloud you sketched. I used black acrylic paint because I ran out of black textile color. It didn't wash out and didn't color my new shirt grey, which is great.
It took me around 20 minutes to stamp whole cloud.


When you're done stamping, wait for 30-45 minutes for it to dry.
I wrote definition of cloud from Oxford dictionary in my favorite font on a piece on paper and copied it on shirt bellow the cloud, first with pencil and then with black textile marker. To get that kinda shabby look of the letters don't press marker to hard.


Done!


Wait for 24 hours for it to dry completely, iron (while inside out!) and wash to remove pencil tracing and your new shirt is ready to wear.


Thursday, January 23, 2014

Oops I did it again.


Već sam pravila ovakvu majicu pre dve godine, ali nakon njenog misterioznog nestanka (najozbiljnije sumnjam da je pojela veš mašina!), odlučila sam da napravim novu. Koristila sam isti flomaster kao i za prethodnu - Giotto permanent textile marker i javljam se samo da potvrdim ono što sam već rekla - ubedljivo su najbolji od svih koji se mogu naći na našem tržištu.
Pozdrav do skorog kuckanja ;)